A is for:
A as the first letter stands for so many things, so this first post in a series is going to be a long one!
Acid Free. All scrapbook products are made with acid free (and lignin free) materials. The reason for this is because a high PH (acid) level in some materials (such as the old fashioned magnetic photo albums) can cause yellowing of the pages as well as the photographs, making them age before their time! If we want our memory books to survive generations, acid free is the only way to go.
Adhesives. How you hold your memory books and layouts together will also determine their quality of life. There are so many adhesives to choose from, so it is hard to know right off what to use where! As a 10 yr scrapper, I will share with you what I have found.
- Glue Sticks: Scotch glue sticks are the best (and no I do not work there or have stock in the company although I should buy some stock). Shopping clubs sell Scotch glue sticks in bulk and that is the best way to go (I also recycle the glue stick rack for my glitter glues). Use glue sticks when adhering paper to paper, or paper to chipboard. Be generous and make sure you hit all edges and corners using a firm circular motion with a side ways fist to smooth pages down onto mini books. I assure you...the paper will not come off, so make sure your edges are properly aligned first. **Never use a glue stick to adhere photos. Over time the harder photo paper could peel right off the page...it has happened to me.
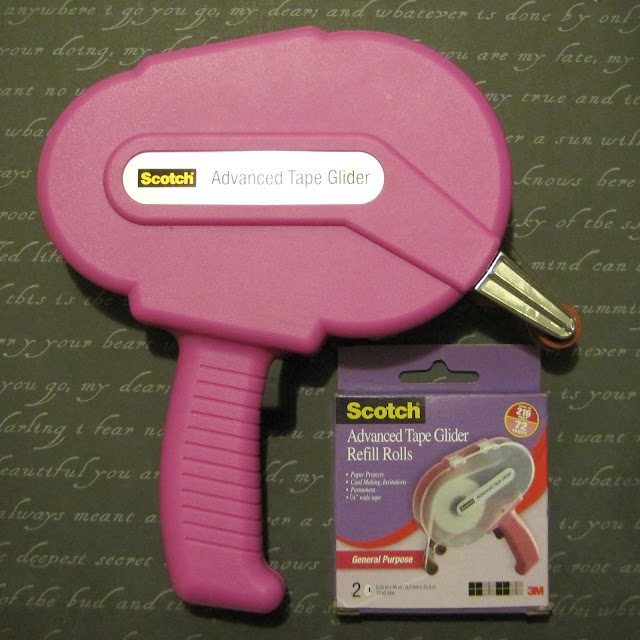
- ATG Gun: What an investment this was, after 10 years of scrapping! Now I know better! I use my ATG gun to adhere photographs to pages, or mats. These things make life easier, they are nice and sticky, and your paper project will not fall apart. I use my ATG for holding tags down, or any type of larger die cut made of card stock, and when making quick greeting cards. I also use it for paper crafts such as adhering paper to boxes that are getting up cycled, and brown bag books.
- Glue Dots: Glue dots come in all sizes and are just a "gem" to work with. If you want to bling out a page with faux rhinestones, buttons, or bows...glue dots are the way to go. Just unroll dots, stick your item on the dot, pull off roll and place on page...waa laa! If you have a lot of bling...do a whole bunch at a time (or save some for later)!
- Pop Dots: Pop dots come in many forms, shapes, and thicknesses. It depends on what the purpose and size is needed to determine which to use. Circle pop dots are great for adding dimension. By putting powder on a sticker then sticking it to a scrapbook page will give a 3-D look to a layout. Adding pockets for journal tags, or photo mats can be accomplished by using strips of foam tape. Of course small rectangular pop squares can be applies to lifting a tag or photo mat right up off of the page as well.
Archival Quality.When something is described as archival, that means it was made with acid free and lignin free products, such as an archival quality memory book.
B is for:
Brads. Brads are little split tabbed metal fasteners, once common in an office setting. While plain gold tone brads are still available at your local office supply store (and dollar store) brads now come in all shapes, sizes, and colors. Gem brads are my favorite, but when I make tissue pom pom flowers I use plain office brads because they will not be seen.
Border Punch. Border punches are awesome tools to invest in and give a finished look to paper edges, tag bottoms, and card openings. There are border punches ranging from 3 inches in length to now huge super 8 punches that punch edges on 12 x 12 size paper in 8 easy punch moves.


No comments:
Post a Comment